
How to make re-usable graffiti in Photoshop tutorial
How to make a realistic graffiti effect in Photoshop
I originally wrote this graffiti tutorial a decade ago. While the style still looks good, the usability sucks. Total update time, let’s make the graffiti on the text layer using all layer styles. The advantage to this is 2-fold. First we can reuse the layer style and secondly, we can change the text and the style will remain on it as we edit. (Non-destructive baby!)
Step 1
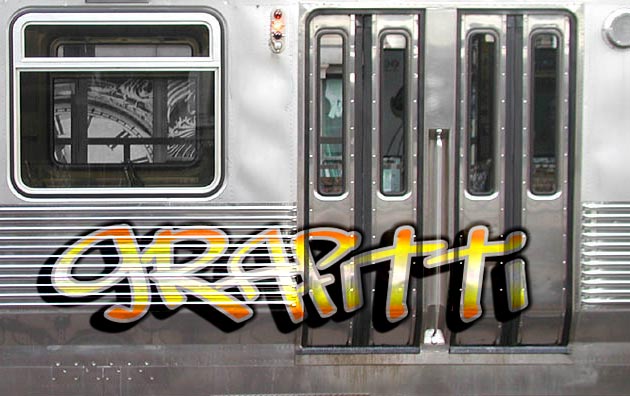
Start with an appropriate font and type the word, graffiti

Here I used Tags Extreme. Download it here | Download the layer style for this tutorial
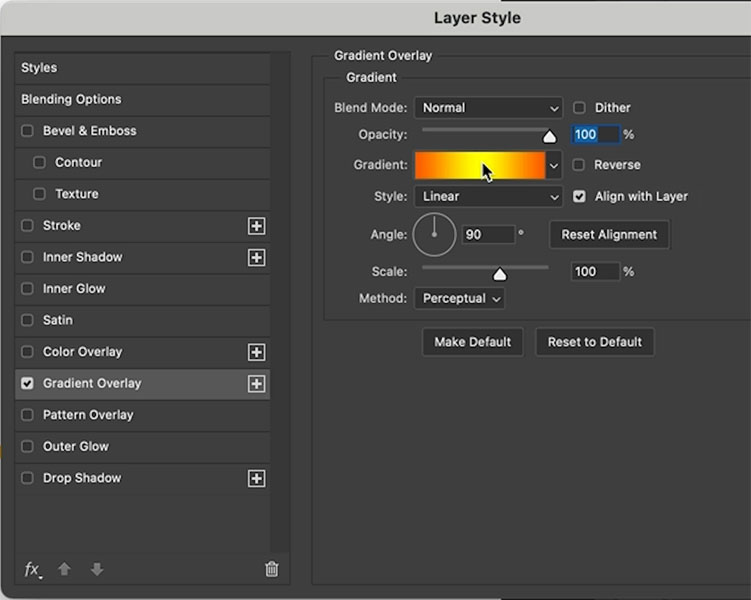
Step 2
In the layers panel, click the little fx for layer styles.
Choose gradient overlay. Click on the arrow to choose a gradient, Choose the legacy orange to yellow one.
If you don’t see legacy gradients, you can load them in like this. (or just proceed with a custom gradient)
Click on the gradient to edit it
Step 3
The gradient editor opens. Click to add a white gradient stop in the middle. (Watch the video to see how to do it)
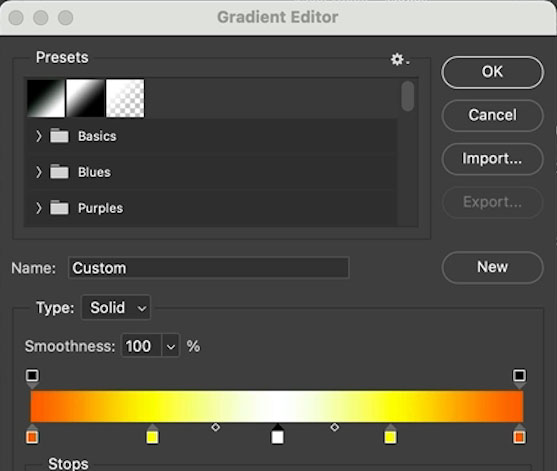
This gives us the gradient color onto the type

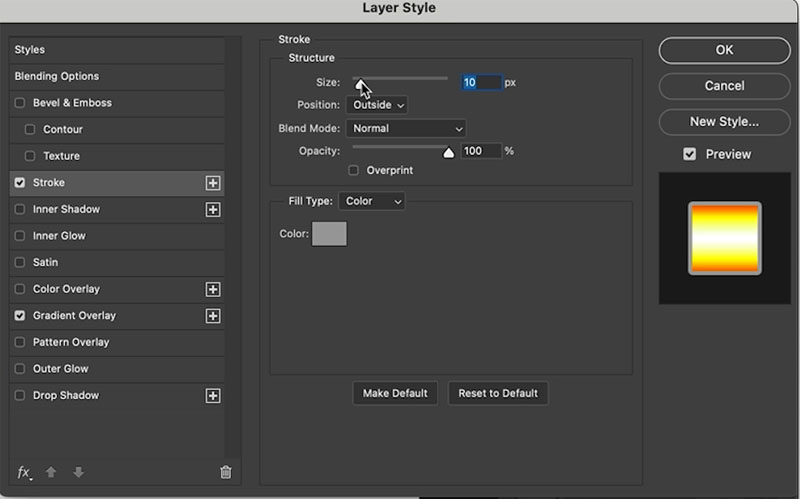
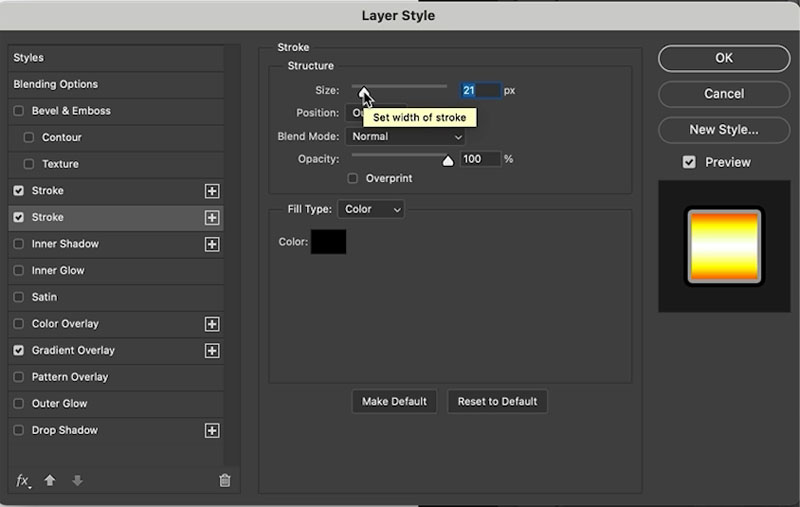
Step 4
Give it a small gray stroke by using the settings shown in the stroke option, size is 10

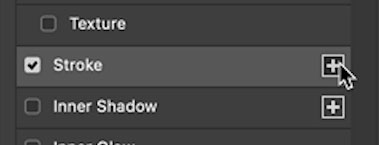
Step 5
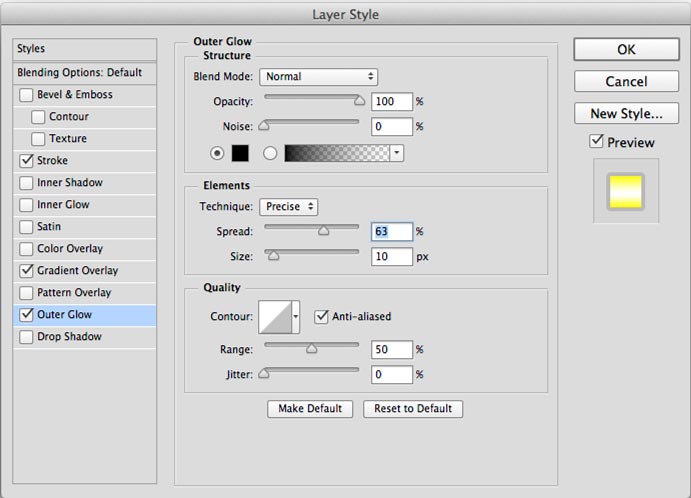
Because we are actually giving this a triple stroke, we need to apply an additional stroke. In Photoshop CC or newer, click the + button next to the stroke to make an additional one.
Set the bottom stroke to black and make it bigger than the gray one, so you can see it.
If you are using an earlier version of Photoshop you have to be clever. Lets use the outer glow as a secondary stroke. Choose outer glow. Blend mode in normal and black. The magic happens with the spread and size. Make sure you turn on anti aliased, or it will look blocky.
Double stroke in action!

Step 6
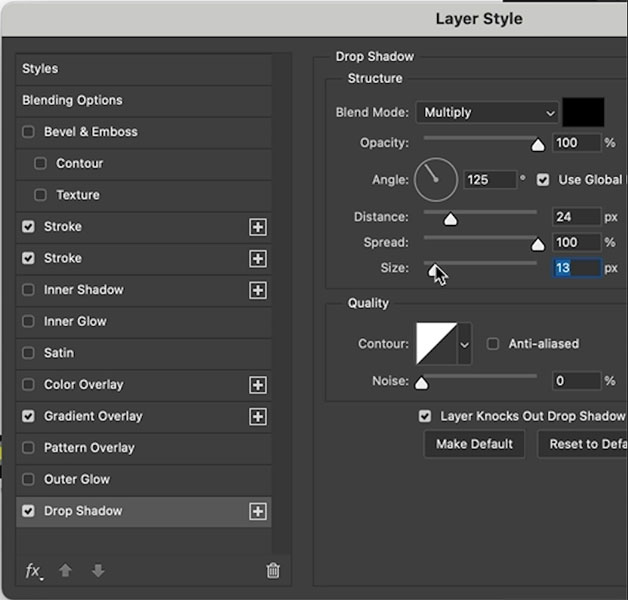
We now need to create the 3rd stroke which is really a hard edges drop shadow, Opacity is al 100 and once again, the magic happens with spread and size. Set the distance to suit your Image. Tip: You can drag directly on your document to set the distance and angle.
Cha! The graffiti is looking good!

Step 7
Because it’s applied as a layer style on a text layer, I can change the text to say whatever I like.


Step 8
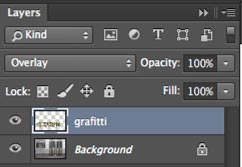
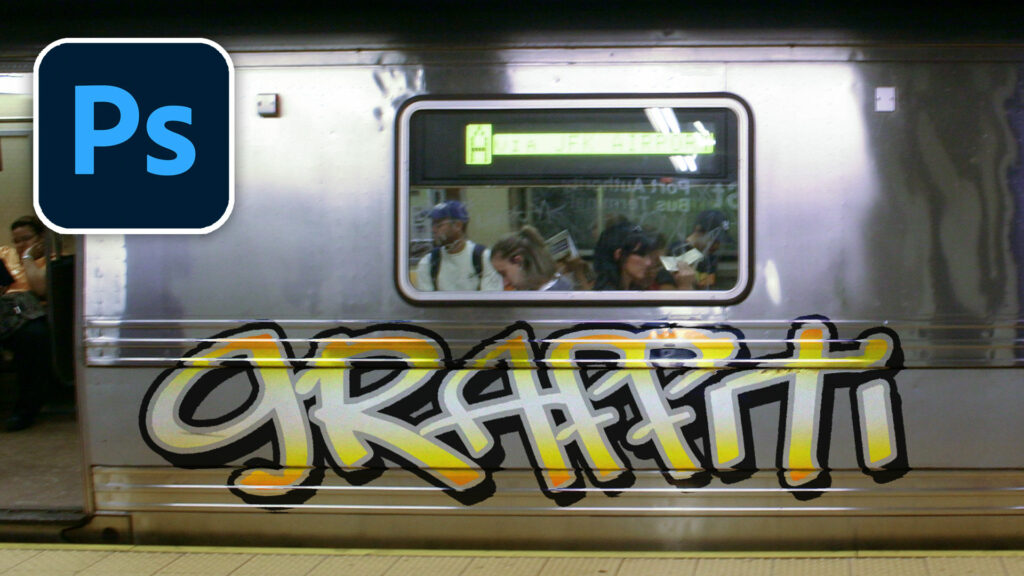
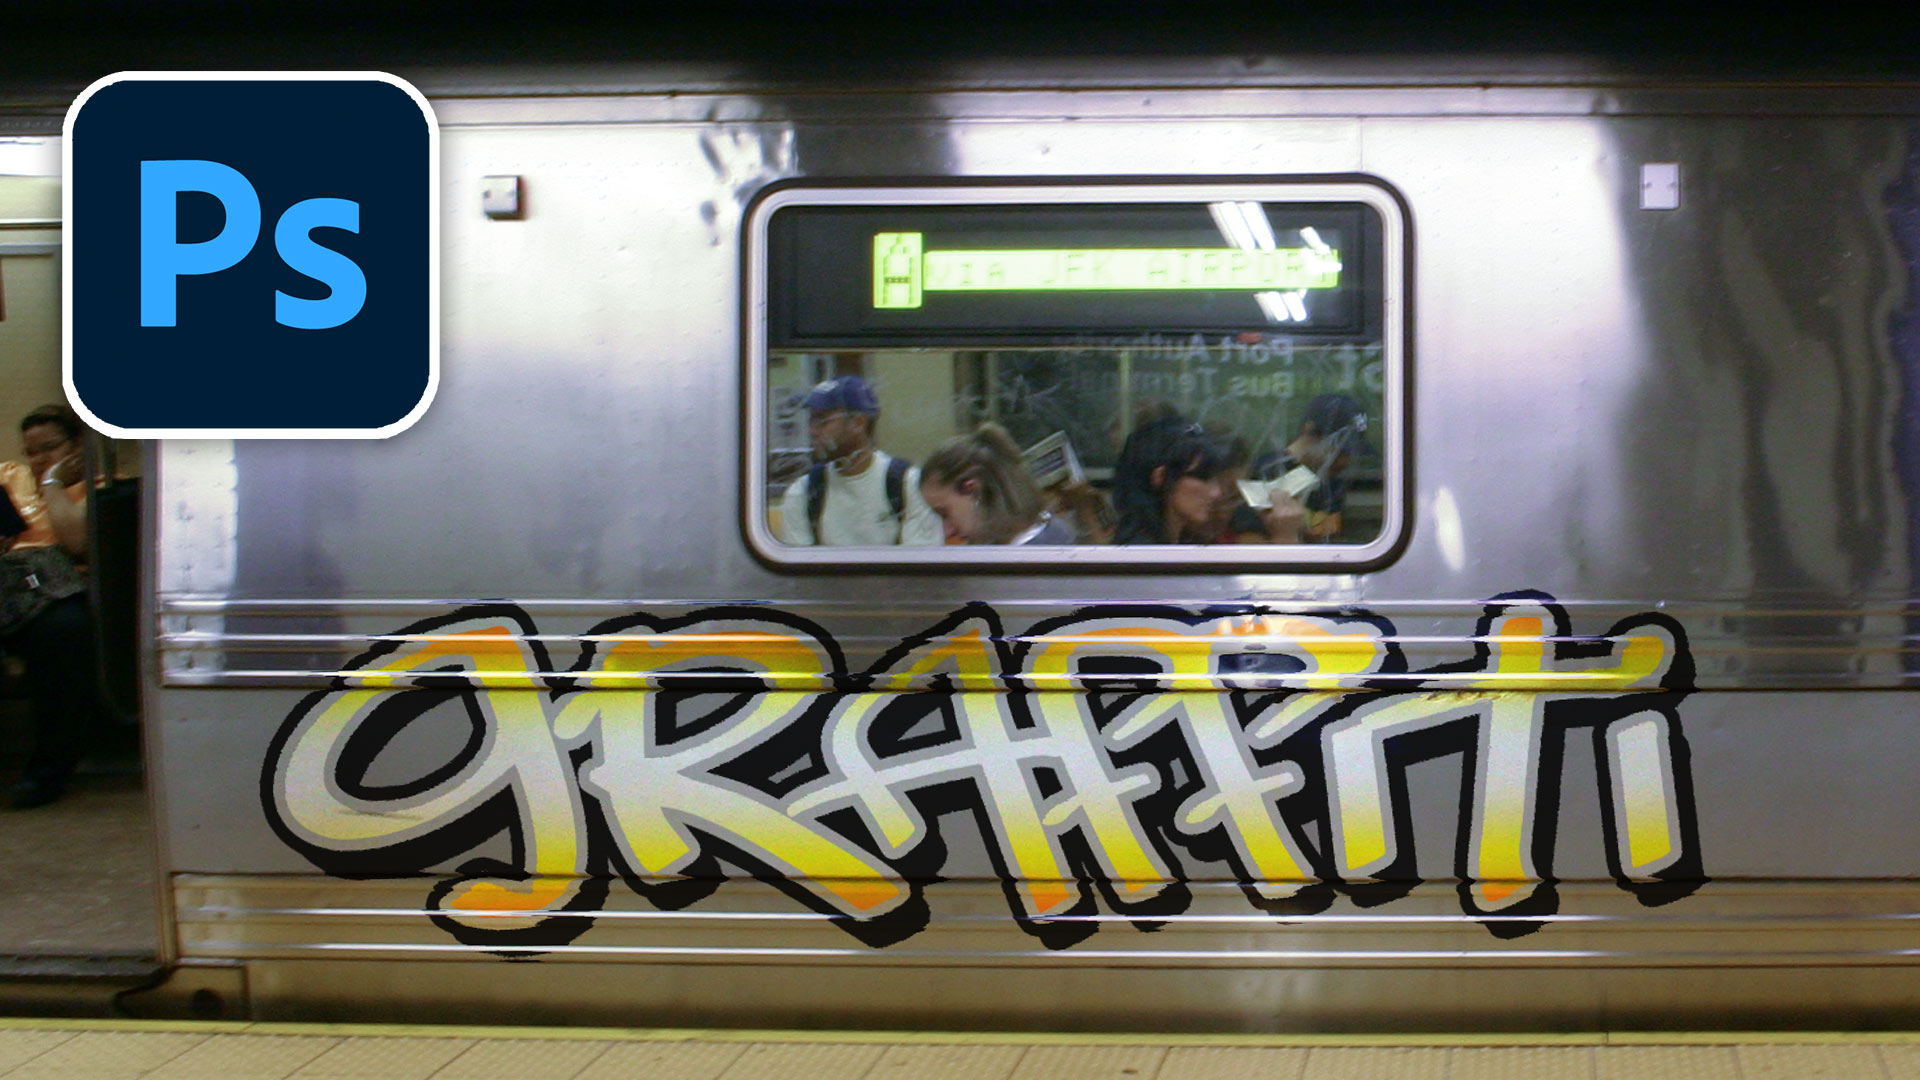
Its really easy to add this graffiti to photographs. All you really need to do is change the blending mode to Overlay.
If you want to make it even better, use a displacement map to wrap it to your surface, tutorial on displacement maps in Photoshop
I hope you enjoyed this updated tutorial
Why don’t you Download the layer style for this tutorial
Great to see you here at the CAFE
Colin
PS Don’t forget to follow us on Social Media for more tips.. (I've been posting some fun Instagram and Facebook Stories lately)
You can get my free Layer Blending modes ebook along with dozens of exclusive Photoshop Goodies here

One thought on “How to make re-usable graffiti in Photoshop tutorial”
Leave a Reply

It's a bird, it's a plane, no it's block letter Extrude in Photoshop. This was a request from the forum:...
New Features in Lightroom Classic 2025 aka Lightroom Classic 14
Learn how to automatically detect and remove visual clutter, people, and vehicles from any photo using the new Find Distractions...


Would be good if I could watch the video – comes up as Private video!