
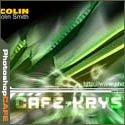
Crystal Craze in Photoshop Photoshop Tutorial
Step 1

Create a new document.Mine was 300X200 pixels. You would probably want something larger. Modify all the settings for a larger image size. Experiment.
Create a new layer
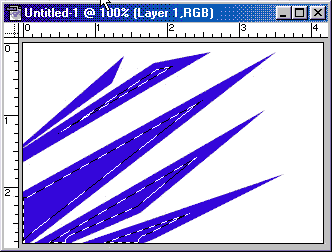
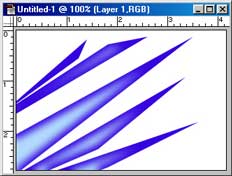
With the Polygon lasso tool, draw your rough shape. Notice that in Photoshop 6 you can draw off the canvas. When you get to the start/finish point you will see a little circle. As soon as you click on the start point, the entire shape will b loaded as a selection.

Step 2
 Fill with a dark color. Here I chose blue.
Don’t deselect.
Step 3
 Now we want to add a gradient, use this method:
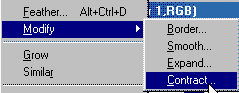
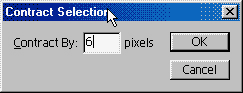
Select>modify>contract
I entered 6 pixels. If you are using a larger image size, consider 10 or even 15
Step 4
 Now we want to soften the selection.
Select>Feather: I chose 5, you may want to choose 10
Step 5
 Choose a lighter shade of the same color as the crystals and fill. I chose light blue.
Step 6
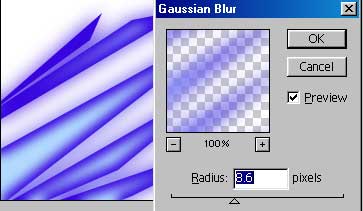 Duplicate the layer and add a gaussian blur to the copy.
Move the blurred layer beneath the original layer.
Step 7
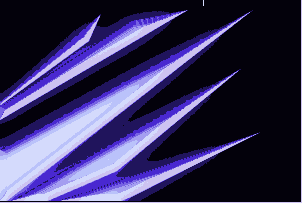
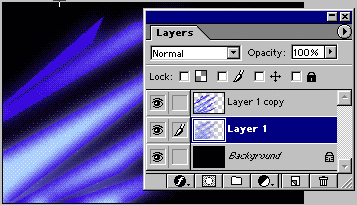 Here I changed the background to black.
Notice the original layer and the blurred layers.
Step 8
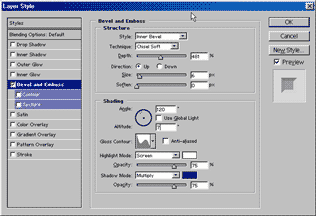
 Here is where the crystals take on their 3D look:
Add a layer style to the shape. (Click the little “f” at the bottom of the layers pallette)
Choose bevel and emboss.
Technique:Chisel soft
Increase the depth and size until you are happy with the result.
Change the gloss contour , uncheck global light and change the altitude to 7
Step 9
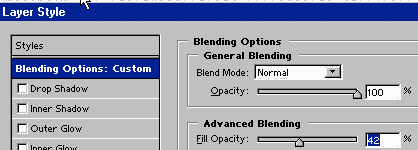
![]() To get the translucent crystal like opacity:
To get the translucent crystal like opacity:
Still in the layer style box. go toBlending options
lower the fill opacity to 42.
Press ok
In the layers pallette, change the blending mode to screen.
Step 10
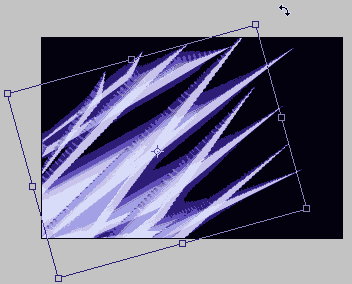
Duplicate the crystal layer.
Press Ctrl/Cmd+T for free transform.
Rotate the new layer, you will see it interact with the other crystal layer.
Step 11
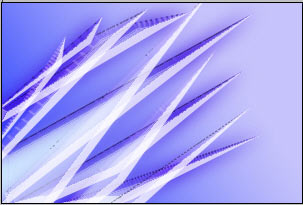
 Time to spruce up the background a bit. I added a linear gradient.
You could do anything you wanted really.
Step 12

 Here is an optional step:
Copy the layer style to the blurred layer. It adds an interesting feel.
If you want you can keep coping layers and rotating them. Experiment and come up with some of your own results.
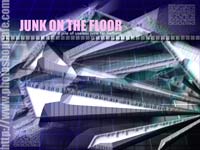
So there you have it. Your own crystals. On the left you will see 2 variations on the theme. Click on them to download the high res wallpapers. Download them, distribute tham freely and load them onto your desktop.
Have fun creating your own crystals. Be sure to show us your finished artwork at the cafe.
Get in-the-know!
Photoshop VAULT
Access valuable Photoshop extras and goodies for free and much more a

One thought on “Crystal Craze in Photoshop Photoshop Tutorial”
Leave a Reply
I've had a few people asking me how I got the outline for my Signature. So here is the tutorial...

Here is a photoshop tutorial that will show you how to roll your own dynamic photo edges in Photoshop

This Photoshop tutorial shows you how to turn day to night and add some nice floodlight effects on a brick...


I’m looking forward to as much information as I can…