In this tutorial, we will use the powerful tools of Photoshop to create a realistic modern smartphone that you can use in mock-ups of mobile applications.
FINAL IMAGE PREVIEW
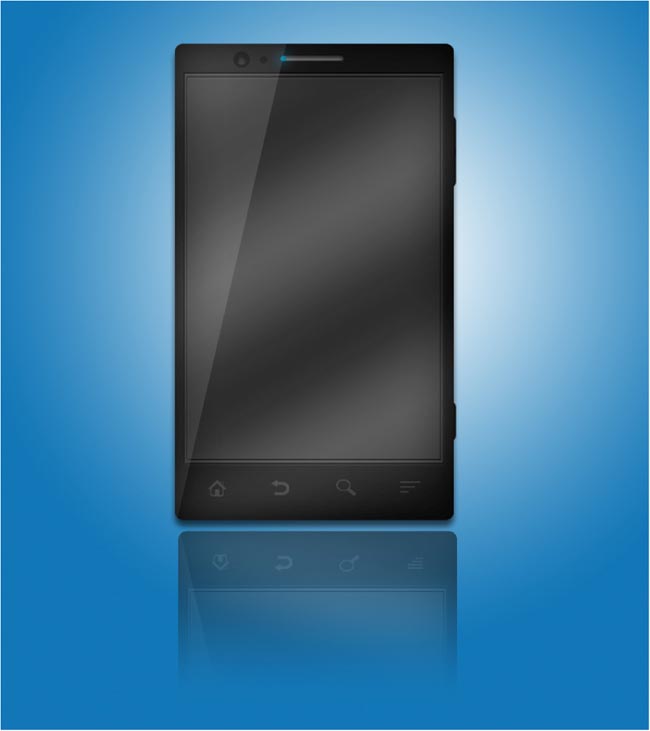
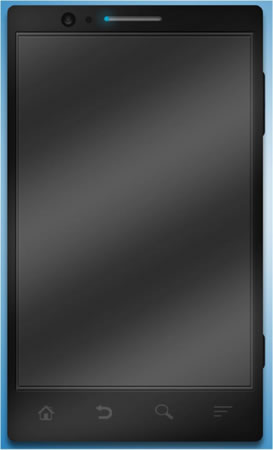
Here you can see a preview of the final work.
Firstly, you have to create a new Photoshop document (Ctrl + N) with size 800 x 900 pixels.
Create the “screen” of our mobile phone. Choose the Rectangle Marque Tool (M), then go to the Style box and select “Fixed Size”. You have to set the size of the screen as 328 x 480 pixels.
Click on the canvas to activate the selection, then paint it. We suggest you using the “Paint Bucket Tool” and setting the colour to #343434.
Let’s add some effects through the “Layer Style” function, particularly we will work on “Bevel and Emboss”.
We set the values like this:
Style: Pillow Emboss
Technique: Smooth
Depth: 100%
Direction: Up
Size: 5
Soften: 0
Angle: 120°
Altitude: 50°
Highlight mode: Linear dodge (Add) (White)
Opacity: 10%
Shadow mode: Multiply (Black)
Opacity: 77%
You will have this result.

Duplicate the “screen” layer and scale it down a little bit. The aim is to get an effect similar to this one:

Every respectable smartphone has a “base”, so we have to create it. You simply have to choose the Rounded Rectangle Tool (U), and set the “radius” to 10 pixels. Just create a shape that is a bit bigger than the screen in order to get a result similar to the one shown below. We made it with this size: 344 x 588 pixels. Make a new layer at the bottom and Fill it with #151515.

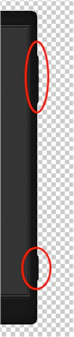
In this step we’re going to create some buttons on the side of the mobile phone. Create a new layer and choose the Rounded Rectangle Tool (U) once again, now draw some small rectangles and fill it with #151515. You can decide how many buttons to add as you wish.
It is also important to add the “multimedia” buttons. Let’s see how we can do it.
Our smartphone has 4 buttons:
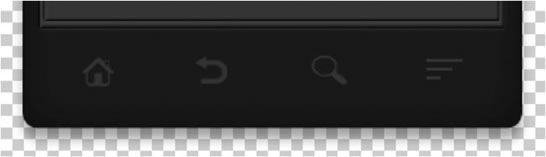
You can draw the “home button house” using the Pen Tool while it’s better to use the Line Tool for the button at the right.
The “arrow” and the “magnifying glass” are made with the “Custom Shape Tool”, indeed these shapes are already present in Photoshop.
All the icon are filled with White, #ffffff, and the Opacity is set to 11%.
NOTE: If you don’t want to draw the house or if you prefer other icons, you can look in the web. There are actually hundreds of them. You can also decide to insert only three buttons, it’s for you to decide.
In this step we are going to create the “front camera”.
First of all, create a new layer. Then choose the Ellipse Tool (U) and draw a small circle, the color is not important.
Now you have to work on the “Layer Style”. Select “Gradient Overlay” and set the values like this:
Blend Mode: Overlay
Opacity: 60%
Gradient: White to Black
Style: Radial
Angle: Between 87° and 93°
Scale: 100%
You also have to modify some “Stroke” values:
Size: 2/3
Position: Outside
Blend Mode: Multiply
Opacity: 64%
Color: A dark one

To finish the camera; Duplicate the previous layer and scale it down.
You just have to change the Opacity: set it to 64%.
Once again duplicate the layer and make the circle smaller. Set the Opacity to 35%.

Every smartphone has an audio speaker, so it’s extremely important to create it in the best way possible.
In a new layer, draw a wide Rounded Rectangle using the rounded rectangle tool. We have to make it seem a real item, so we definitely have to add some style in order to get the following result:

Pick the “Inner Shadow” and set the values in this way:
Blend Mode: Multiply
Opacity: 60%
Angle: 125° to 130°
Distance: 0
Choke: 35
Size: 12
Noise: 0
Now move to “Bevel and Emboss”:
Style: Pillow Emboss
Technique: Smooth
Depth: 100%
Direction: Up
Size: 2
Soften: 0
Angle: 124°
Altitude: 25°
Highlight mode: Linear dodge (Add) (Color: White)
Opacity: 10%
Shadow mode: Multiply (Black)
Opacity: 78%
Finally let’s modify the “Gradient Overlay”:
Blend Mode: Normal
Opacity: 70%
Gradient: White to Black
Style: Linear
Angle: 90°
Scale: 100%
Draw a small circle and color it with #33caf3. Let’s add an “Inner Shadow”:
Blend Mode: Multiply
Opacity: 50%
Angle: 100°
Distance: 0
Choke: 0
Size: 6
Noise: 0
We also have to set an “Outer Glow”:
Blend Mode: Add
Opacity: 70%
Noise: 0
Technique: Softer
Spread : 0
Size : 11
NOTE : Remember that the color you will use for the “Outer Glow” should be the same you used to fill the circle, in this case #33caf3. Anyway you can use another color!

Draw another small circle and place it between the camera and the audio speaker.
Set the following “Inner Shadow”:
Blend Mode: Multiply
Opacity: 80%
Angle: 112°
Distance: 0
Choke: 0
Size: 8
Noise: 0
NOTE: This step is not mandatory.

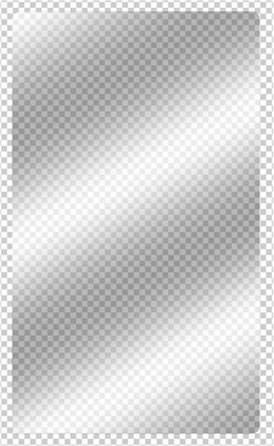
This is one of the last steps. We have to create some highlights to make the screen seem more real.
Just pick the Gradient Tool and choose a Custom Gradient: you have to create one that alternates light-grey and white. Set the opacity between 55% and 65%. This is the result:
In a new layer create a triangle using the Pen Tool. Fill it with White (#ffffff) and set the Opacity to 3% or 5%.
We have now reached the final and simple step. You have to create a selection that is the same of the “base”, then fill it with any color. It’s not important the one you choose because we will set the “Fill” value to 0%.
Differently we’ll work on the “Inner Shadow”:
Blend Mode: Multiply
Opacity: 75%
Angle: 115°
Distance: 0
Choke: 0
Size: 68 to 75
Noise: 0


The Smartphone is now ready for you mockups and the tutorial has come to an end. We hope you are satisfied with your result.

This site uses Akismet to reduce spam. Learn how your comment data is processed.
How to get the best Black and White conversion in Lightroom in 2 minutes Here is a quick tip for...
This tutorial goes deep into the workings of the professional grade Color grading in Photoshop 2021 and includes handy tips...

How to make a photo collage in Photoshop by blending layers together. Photoshop collaging and compositing tutorial...


Leave a Reply