Creative dreamy effect to a Photograph and create a basic CD cover
Creative effects with Photos.
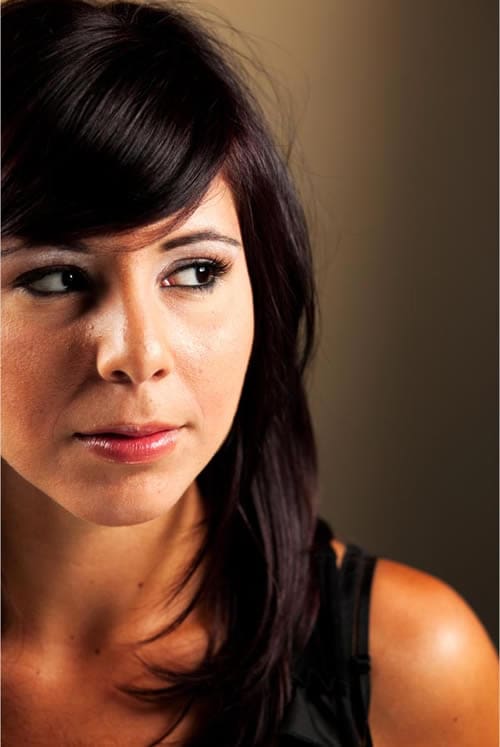
In this tutorial, we are going to apply one of my favoriate effects to a photograph. This will soften it and add some nice color and contrast. It only takes a second. In a form of subtlty, I use this effect on almost all my photos. To start with, we will use a photograph I shot of model, Crystal. I shot this photography with a Canon 5D mk2 and a 50mm prime lens. I used a two light setup, one in fron to the viewers right and one behind in the opposite. (You don’t really see the back light in this shot). I also used a silver reflector to fill in the light on the left.

Step 1
Because of the type of effect we are going for, let’s add some punch and contrast to the photograph.
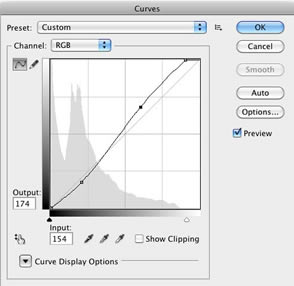
Create a Curves adjustment. Usually I would use adjustments layers, but in this case Press Cmd/Ctrl+M to open curves. Make a slight S-curve by darkening the shadows and increasing the highlights a bit. Notice that I pushed the white point to the left so that the adjustment starts at the beginning of the histogram.
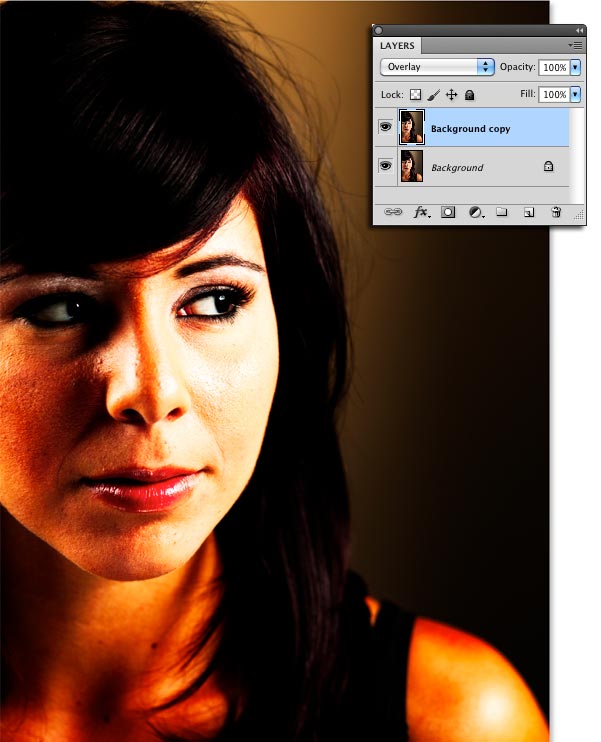
Step 2
Duplicate the Layer and change to Overlay Blend Mode
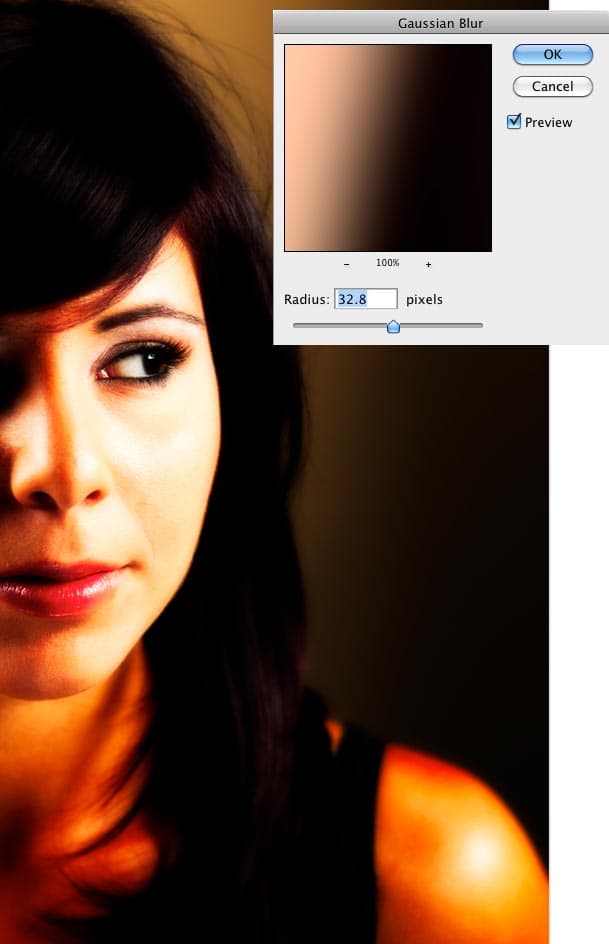
Step 3
Add a Blur to the top layer
Filter>Blur>Gaussian Blur
(Note, I went back and did some very subtle spot healing work to the image to get rid of a few spots)
Choose the amount of blur depending on the resolution. In this case I’m working on a high res image so, I used 32.8. Low res might be somewhere in 5 range or so. You will be able to tell by eyeballing it. As you move the slider, the image will take on this nice dreamy look, when you go too far that look stops. Find the “sweet spot” and apply. For some images, you could stop right here, I like the soft dreamy look we have. But let’s go on, to learn a few more things.
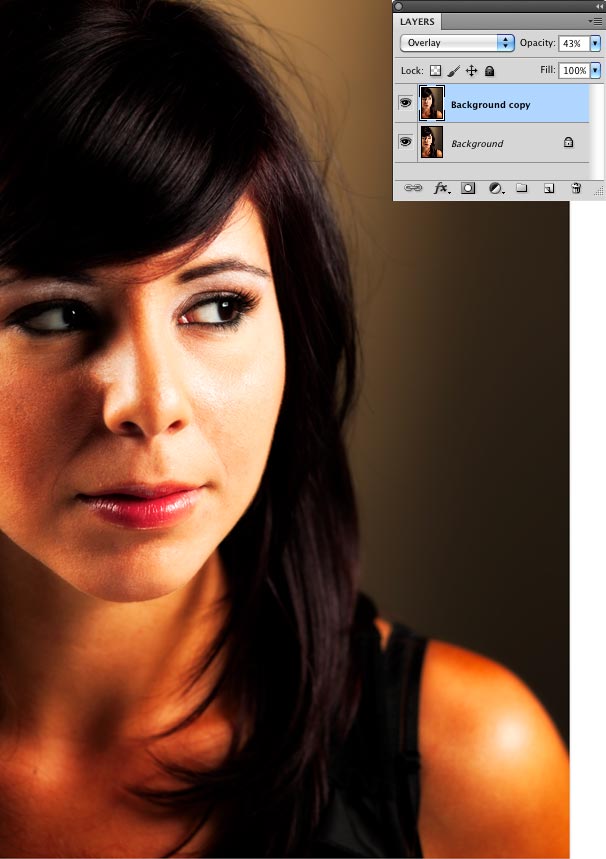
Step 4
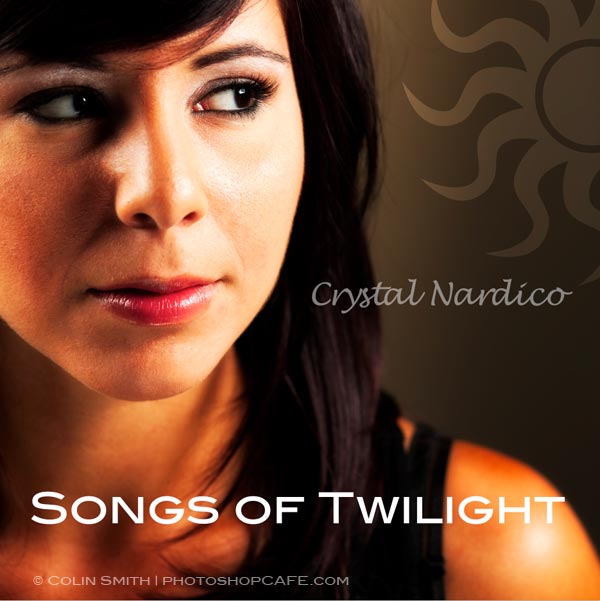
I reduced the opacity to about 40% to make the effect more subtle. This is a usable photo effect right here.Let’s move on and create a basic CD cover.
Step 5
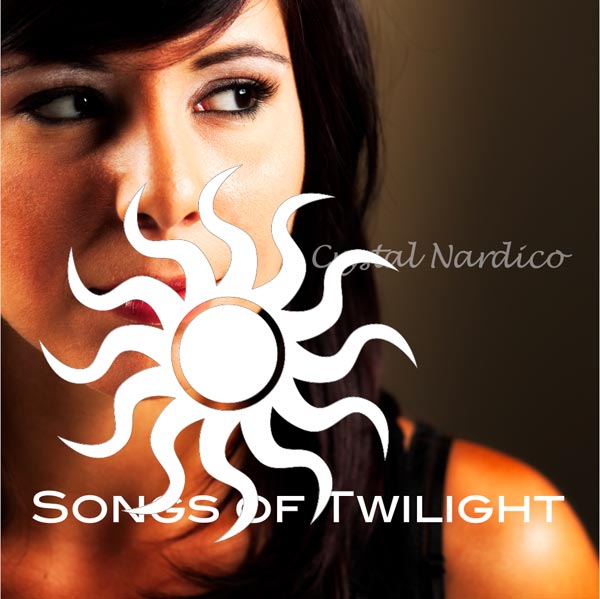
Lets make a CD cover. This is just a really basic idea for fun, we cover other more advanced designs in other tutorials. Crop the image to a Square shape to it looks more like an album cover.
Add some text for the artist.


Step 6
Choose the Custom shape tool for the toolbox. It’s nested under the line tool.
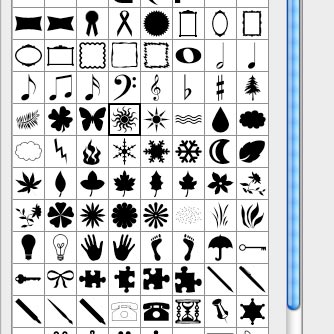
Select the shape layer option on the left side of the top tool bar
Choose a custom shape from the top tool bar. (If you don’t see many shapes, choose all from the little arrow on the right of the presets). Select append when it asks what to do.
Grab the sun shape.
Hold down shift (to constrain)
Drag out the shape on your image.
Step 7
Drag the shape into position. You can scale it up or down and you will lose no quality because it’s a vector.
Change to Overlay mode and change the opacity to suit your tastes.
I added another super basic line of text as an album name.
There you go. I hope you liked this tutorial!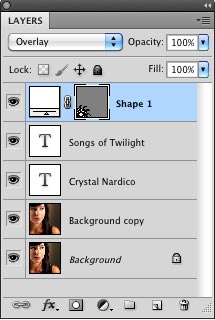
PS Don’t forget to follow us on Social Media for more tips.. (I've been posting some fun Instagram and Facebook Stories lately)
You can get my free Layer Blending modes ebook along with dozens of exclusive Photoshop Goodies here


How to make a realistic looking shadow in Photoshop. This photoshop tutorial shows how to cast a shadow, Colin Smith's...
How to edit your photos like a pro in Photoshop in 4 easy steps. A free mini masterclass in photo...

Use Path blur in Photoshop CC to add a custom motion blur to an object in a photo without any...